


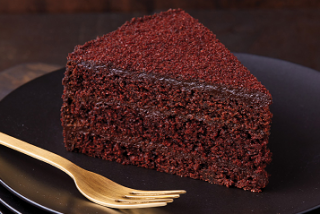
Brooklyn Blackout Cake
Description
This iconic cake was named after the World War II blackouts. JVNA member Fran Costigan, known for good reason as the "Queen of Vegan Desserts," created this version. The cake layers can be made days in advance, while the pudding can be made a day ahead of time and refrigerated in a covered container. Important: The cake calls for a double recipe of the pudding.
You can find out more about Fran and find more of her recipes at www.francostigan.com.
Summary
| Yield | |
|---|---|
| Prep time | |
| Cooking time | |
| Total time |
Ingredients
Instructions
1. Position a rack in the middle of the oven and preheat to 350° F. Oil the sides and bottoms of two 9 x 3-inch round cake pans. Line the bottoms with parchment circles. Do not oil the paper.
2. Place a wire mesh strainer over a large bowl. Add the sugar, whole wheat pastry flour, all-purpose flour, cocoa, baking soda, and salt to the strainer and stir with a wire whisk to sift the ingredients into the bowl. (If any small bits remain in the strainer, add them to the mixture in the bowl.) Whisk to aerate the mixture.
3. Whisk the water, oil, maple syrup, vinegar, vanilla, and chocolate extract (if using) in a separate medium bowl until completely combined. Immediately pour into the dry mixture and whisk until the batter is smooth.
4. Divide the batter between the 2 pans. Rotate the pans to level the batter and tap them lightly on the counter to eliminate air bubbles.
5. Bake on the middle rack for 30 to 35 minutes, or until the tops of the cakes are set, the sides have started to pull away from the pan, and a wooden toothpick or skewer inserted into the center comes out clean or with just a few moist crumbs.
6. Set the cakes on wire racks. After 5 minutes, run a thin knife around the sides of each cake to release the sides of the cake from the pan. Invert each cake onto a rack. Remove the pans and carefully peel off the parchment paper. It is fine to cool the cakes bottom side up.
7. When the cakes are completely cool, slide a 9-inch cardboard cake circle under each one. Wrap the layers with plastic wrap and refrigerate for about 1 hour, or until cold.
8. Use a long serrated knife to slice each cake layer in half horizontally to form four layers. Crumble one of the layers into a food processor. Pulse the processor a few times to make medium-size crumbs, but stop before they get too fine. Pour the crumbs into a bowl.
9. Line a rimmed baking sheet with parchment paper. Place one of the remaining three layers, still on the cake circle, on the baking sheet. Spread with a scant cup of the pudding. Place a second cake layer on the pudding, board side up. Remove the board and spread the layer with another scant cup of pudding. Slip the board under the last layer and invert it onto the cake. Spread with another scant cup of the pudding. Refrigerate the cake and remaining pudding for 20 minutes. (It is easier to finish a cold cake.)
10. Cover the sides of the cake with the remaining pudding. Sprinkle the top and sides of the cake liberally with the cake crumbs, completely covering the pudding. Pat the crumbs lightly to make sure they adhere. Use all the crumbs, even the ones that fall onto the paper.
It’s best to serve this cake within 24 hours, but it will hold up for a day in the refrigerator. It is not necessary to wrap the cake.